Matt's Old Cars.com
Fiddling with Rambler's since 1995
Project Charity: AMX
Technical Information
Photo Gallery
Rambler American Restoration
1978 El Camino
1967 Rambler American
2007 Dodge Ram
1984 Dodge Ramcharger
Links
FAQ
Send me an e-mail:
Contact Form
Back to American Restoration Index
Holley Model 1931 Rebuild
Carburetor Disassembly (cont.)
The next step is to remove the metering block screws with a #2 Philips screw driver (red arrows).
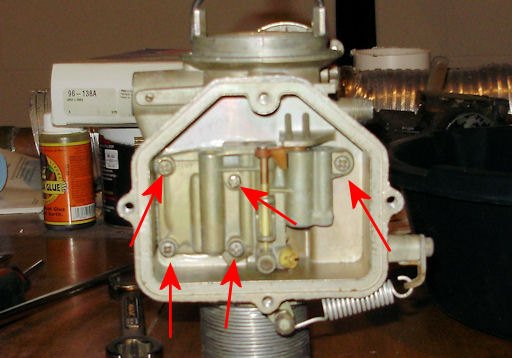
Note: The center, top screw is a smaller size than the rest of them.
Remove the metering block from the main body. Chances are, the metering block will be stuck to the gasket so you may need to gently pry between it and the side of the main body to loosen it.
Warning: The power valve assembly (tan thing next to the
small screw) is spring loaded. Gently press down on it when removing the
metering block.
Note: If you didn't pay attention to the
above warning and the spring went flying across your work area, be aware
that the springs are calibrated to the engine and transmission of your car
and should not be replaced with generic replacements.
Remove the spring and any spacers from underneath the power valve piston. Working over your parts container, gently compress the spring on the brass rod (it is best to push it against the piston arm), remove the e-clip, and slowly release the spring pressure. Remove the fiber washer and spring from the rod. The picture below shows these parts in order of assembly. If your car surges during steady state cruising and you've ruled out a loose intake manifold, chances are the power valve isn't working properly. You can verify its operation at this time. It should move freely with light finger pressure and return when the pressure is released.
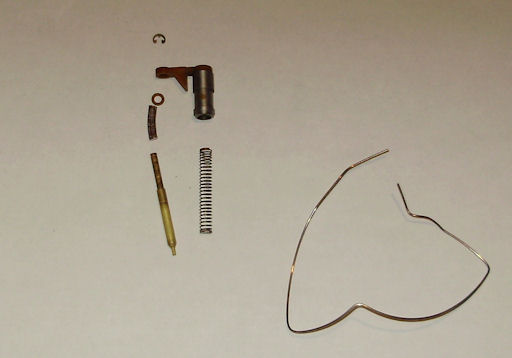
Note: These springs have a tendency to get away from me so I put them on a piece of wire (see above picture) so I don't lose them. Also, if you bend the wire as shown, the smaller spring will not slip inside of the larger one and you can leave them on the wire when cleaning.
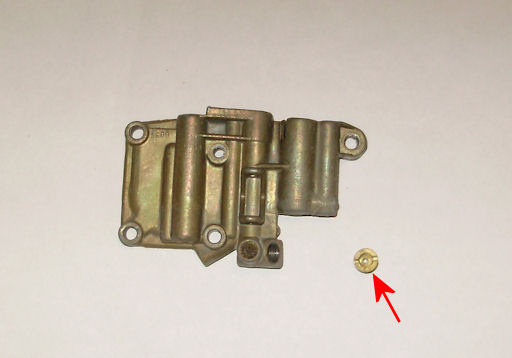
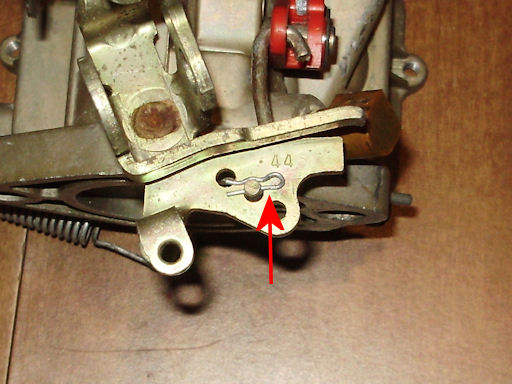
Using the 5/16" flat blade screw driver or Holley jet tool (preferred), remove the jet (red arrow, shown already removed) from the metering block.
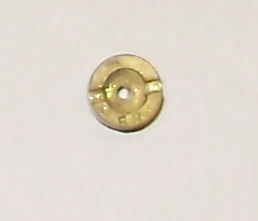
Holley jets have a number stamped in them that indicates the size of the hole in the middle. A larger number indicates a bigger hole. The one shown below is a #58. Sizes 50 -58 are common in these carburetors. If your carburetor is a previously rebuilt unit (very common unless you have a low mileage car), you should check to make sure you have the correct sized jet. The reason is these are generally rebuilt from a pile of parts as quickly as possible. If the jet is too large, you'll get poor highway economy and if it is too small, you'll have a reduced top speed and may have slightly sluggish operation once you are out of the idle circut. The proper jet size is listed in the TSM. In Kermit's case, it should have a #56. This carburetor had a #50 in it when I got it but I had a #58 on my parts carburetor so I used that instead. Fuel economy and top speed both improved with this change.
If your carburetor has a dashpot, remove it now.
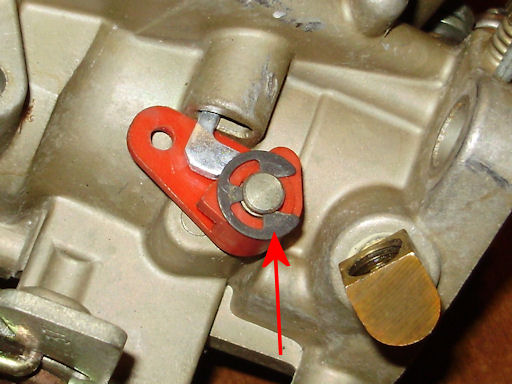
Remove the clip from the accelerator pump link (red arrow) and remove the link from the throttle and pump levers.
Remove the accelerator pump diaphragm (this is the large gasket under the metering block) and return spring. The diaphragms are often very hard and stick to the main body so you will need some patience to get it out. Once it is removed, place it in your discard pile. Clean up any stuck material with the razor blades or gasket scraper.
Remove the accelerator pump arm retaining clip (red arrow) and remove the arm from the carburetor.
Last Updated 03/04/10 08:52:23 PM