Matt's Old Cars.com
Fiddling with Rambler's since 1995
Project Charity: AMX
Technical Information
Photo Gallery
Rambler American Restoration
1978 El Camino
1967 Rambler American
2007 Dodge Ram
1984 Dodge Ramcharger
Links
FAQ
Send me an e-mail:
Contact Form
Back to American Restoration Index
1967 Wagon Quarter Panel Repair
Part 4 - Putting It Back Together Part 2
March 25, 2006
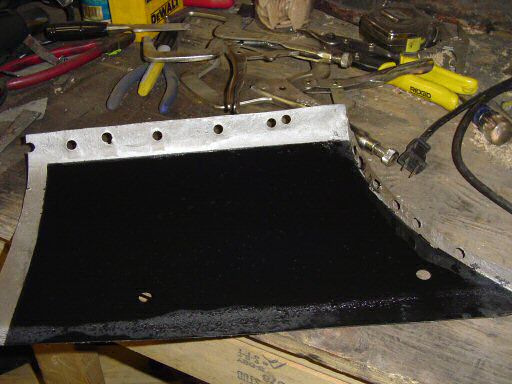
Patching the quarter itself has officially started. Last week, I trimmed the bottom patch panel to length and punched two holes for the clips that hold a trim panel on. Those holes are 1/2 inch diameter and are spaced 9 inches apart and 3/4 inch below the top of the lower body line. The left hole was lined up with part of an existing hole and the right hole was measured off of that. It looks like these holes were originally drilled out but since I had access to a punch, I used it instead since it makes a cleaner hole.

One quick note about the black line at the top of the panel. The strip was made with a black permanent marker and the reason for it is that I'll need to trim it for height and where I need to cut it is just about in the middle of that stripe. This will allow me to position the piece and then use a scribe to make a mark where I need to cut it.
This week, I applied rust preventative paint and weld through primer to the car itself and the above patch panel. On the car, I masked the pinch weld flanges off, sprayed the rest preventative paint, let it dry, and applied the weld through primer.
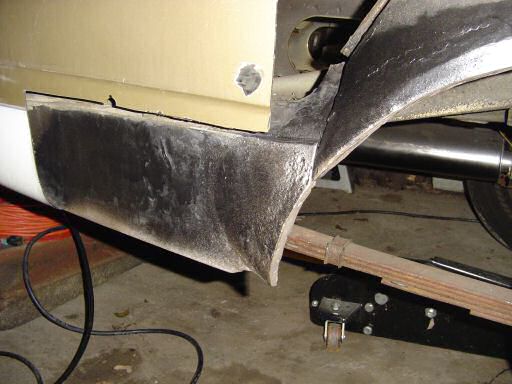
On the patch panel, I did the exact opposite.
I'd hoped to make more progress today but since it's still colder than normal (and more importantly, colder than the minimum temperature for the two coatings I applied), I had to break out the torpedo heater and wait a few hours for the garage and car to warm up.
Up next: Installing the lower patch
Last Updated 04/01/06 02:37:29 PM