Matt's Old Cars.com
Fiddling with Rambler's since 1995
Project Charity: AMX
Technical Information
Photo Gallery
Rambler American Restoration
1978 El Camino
1967 Rambler American
2007 Dodge Ram
1984 Dodge Ramcharger
Links
FAQ
Send me an e-mail:
Contact Form
Back to American Restoration Index
Vacuum Wiper Motor Re-Assembly
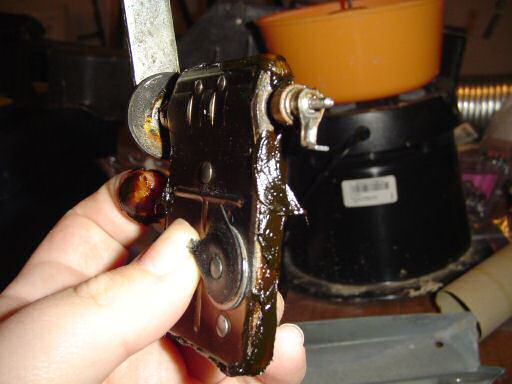
One of the things I got docked for at the 2007 AMO International show was the filthy wiper motor on my 1967 wagon. For what ever reason, this thing was absolutely filthy. It was almost like it was covered in tar. Nothing else around it was that bad so this remains a messy mystery as to how it got that dirty. In any event, I didn't take any pictures as I was taking it a part (too dirty for my camera) but the process is easy:
Note: Before you decide to do this just because your wipers don't work, you need to check to make sure that the wiper motor is the problem. After 40 or 50 years of service, it's common for the diaphragm in the fuel pump to go bad which will also cause the wipers not to work properly. To check to see if the booster section of the fuel pump is working, disconnect the vacuum line and hose at the pump, plug the line going to the manifold, connect a vacuum gauge to the outlet side of the pump and start the car. With the engine running between 800 and 1000 RPM, the booster pump should make 14 to 18 inches of vacuum. If it doesn't, the fuel pump will need to be rebuilt or replaced. I had the fuel pump in my 1967 American rebuild by the folks at http://www.then-now.com and I'm very satisfied with the work they did. They also sell rebuild kits if you want to do the work yourself.
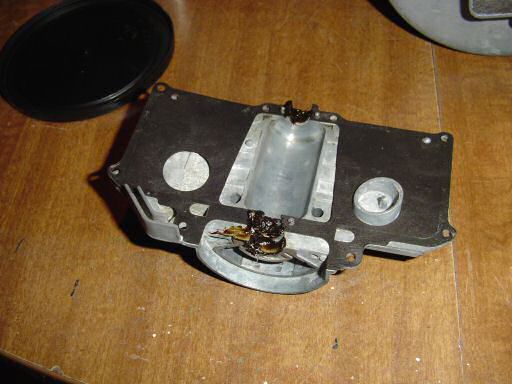
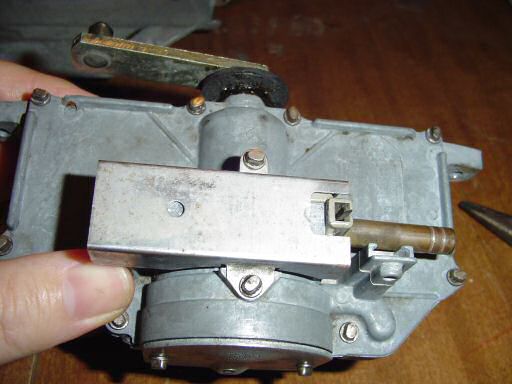
- Remove the wiper motor from the car. On Americans, there is a clip from the cowl to hood seal that going into the mounting plate. Gently work that out, disconnect the control cable, remove the four mounting screws, and remove the motor to linkage clip.
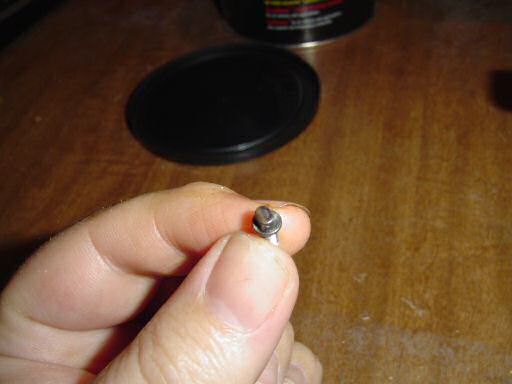
- Drill out the two motor to mounting plate rivets with a 5/16" drill. Once the heads are cut off, use a punch to push the rivets out. If you are going to rivet the motor and plate back together, save the washers.
- Turn the drive arm so it points to the top of the plate and wiggle the motor out. There is a seal around the arm that may stick to the plate. Some gentle prying will get it loose.
- Remove the clamp for the control cable.
- With a pair of needle nose pliers, remove the two screws holding the cover on the control slider. Remove the cover, spring, and slider assembly.
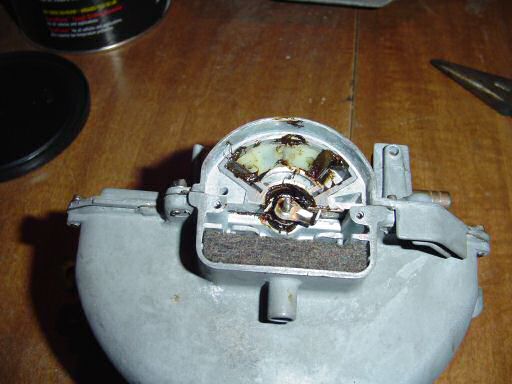
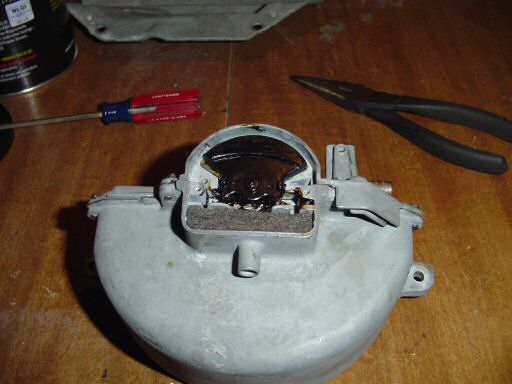
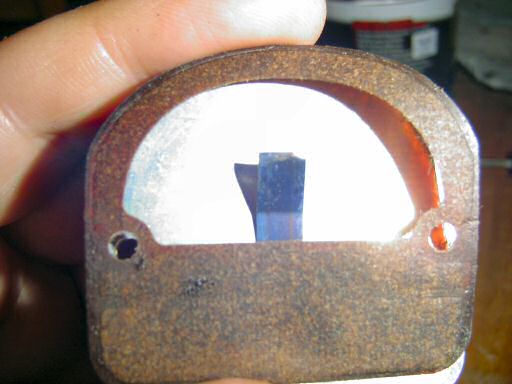
- Remove the two screws from the front cover. Gently remove the cover, the gasket, the felt filter, and black and white valves.
- Remove the eight screws holding the top cover to the main body. Gently remove the cover and the gasket (it is in two pieces).
- Remove the paddle.
- Clean all the old grease from the paddle and valves.
The wiper motor castings are pot metal so in the interest of not wanting to hurt them, I tried dish soap to clean them. That didn't do much so I stepped up to the purple cleaner stuff I picked up at Advance Auto Parts cut with water (1 part cleaner, 2 parts water) and I only cleaned the metal parts with it. The plastic parts were cleaned with dish soap, gaskets were carefully wiped clean. I used blue paper shop towels and some soft brushes and got all of the goo off of it. Also, these castings are fairly fragile so make sure that you don't drop them or set anything heavy on them.
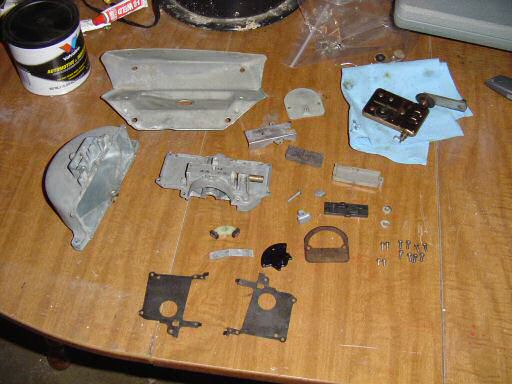
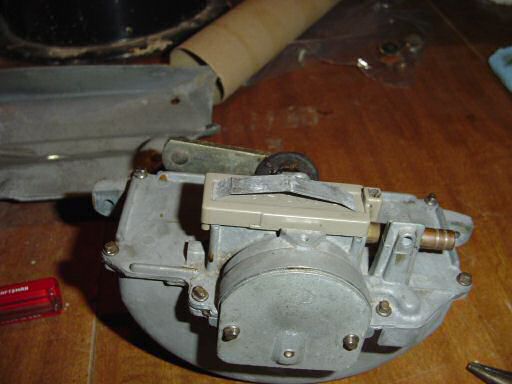
Since my motor worked just fine before, I didn't spend too much time looking for problems and put it back together. Since it's all clean now, here are pictures I took as I did that.
Here are the cleaned up parts (I didn't do any metal refinishing, this is just what they looked like after being cleaned). There really isn't much to it.
First thing I did was to install the felt filter.
Next was to lightly grease the leather seal on the paddle (I used a multi-purpose grease, you want something fairly heavy), pack a small amount of grease into the bearing cavities in the lower half of the motor, and install the paddle. There should be some resistance when you do this. BTW, if the leather is dried out, you can try using leather conditioner to make it swell back up. Also, old, dried grease is a very common cause of the wiper motor not working.
Here are the body gasket halves.
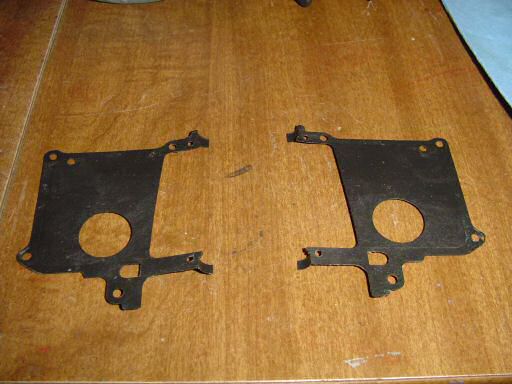
They get installed on the top plate with some grease over the gap between them.
Here is what the screw heads look like on all of the screws that go into the motor body. I'm sure there's a special driver but needle nose pliers work just fine. Install the eight long, fine thread screws to hold the cover down. Do not tighten them super tight or you may strip threads or do other damage to the motor.
Lightly grease the white slider valve and install it.
Install the black slider valve. At this point, it would be a good idea to turn the motor by hand. You are looking for smooth operation, movement in the valves, and you want to hear the air moving evenly through the motor. These two plastic parts are what controls which side of the paddle sees vacuum. If you've ever looked at how steam engines work, it's pretty much the same thing except these suck while steam engines blow (sorry, couldn't resist!).
Install the front cover and it's gasket. Use the two course threaded screws.
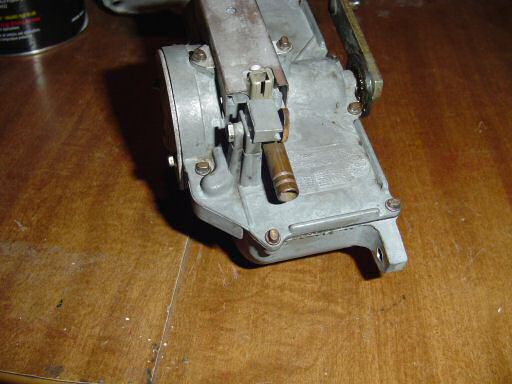
Install the rubber block in the slider as shown. and set it on top of the motor.
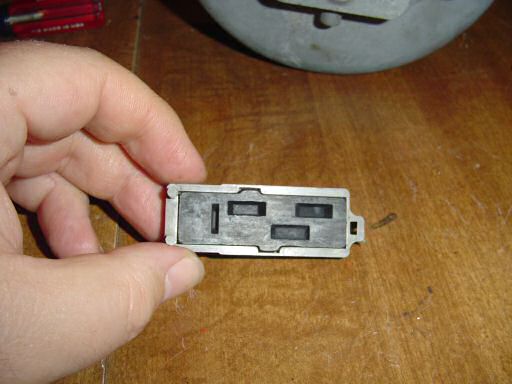
Place the slider spring on top of the slider.
Install the slider cover.
Install the clamp for the control cable.
Once everything is together, move the slider away from the clamp and turn the motor by hand. The motor should move evenly with some resistance and you should be able to hear air moving through it. There should also be a vacuum at the inlet port on the front of the motor. Move the slider towards the cable clamp and the motor should move easily in only one direction.
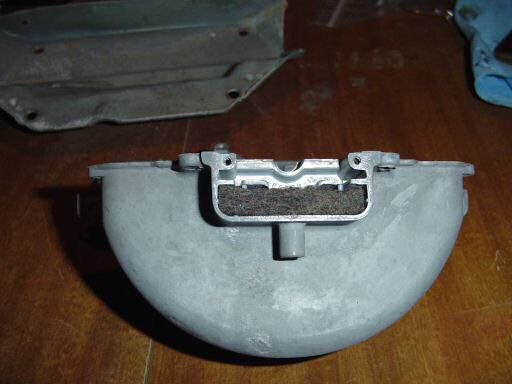
The final step is to re-attach the motor to the mounting plate. Unfortunately, the rivets I purchased were not long enough so that will have to wait for another day.
Last Updated 09/01/09 10:50:11 PM