Matt's Old Cars.com
Fiddling with Rambler's since 1995
Project Charity: AMX
Technical Information
Photo Gallery
Rambler American Restoration
1978 El Camino
1967 Rambler American
2007 Dodge Ram
1984 Dodge Ramcharger
Links
FAQ
Send me an e-mail:
Contact Form
Back to American Restoration Index
Carter Dual Action Fuel Pump Rebuild
Part 3 -
Assembly
September 25, 2010
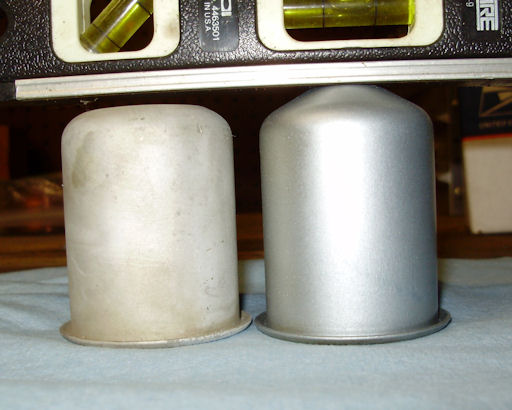
I started putting the pump together tonight. Before I get into the actual reassembly, I want to show you just how damaged the fuel bowl was. The one on the left is what was on the car when I got it. As you can see, the end of it was crushed flat. This is caused by trying to fix a leaking gasket by cranking down on the retaining screw. I don't think the gasket is available separately but a replacement filter with a new gasket is readily available. The filter I used is a Wix #33038. The replacement fuel bowl came from Kennedy American. One thing to note is that the replacement fuel bowl has the wrong finish on it (gold cad instead of zinc). I solved that by media blasting the outside of the replacement and painting it.
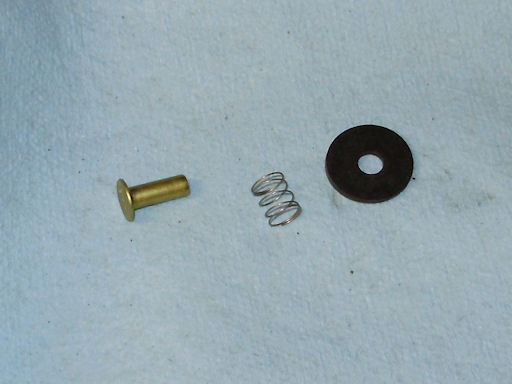
Here are the parts that make up the replacement check valves in the pulsator section of the pump.
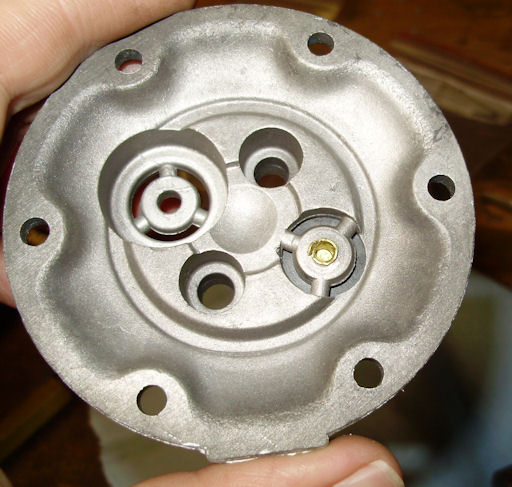
You'll need to drive the rivet through the pulsator section until the end just sticks out from the other side. Once you do this, you'll need to peen the end of the rivet so it doesn't slip out.
Up Next: Assembly continued.
Last Updated 12/04/10 02:31:22 PM