Matt's Old Cars.com
Fiddling with Rambler's since 1995
Project Charity: AMX
Technical Information
Photo Gallery
Rambler American Restoration
1978 El Camino
1967 Rambler American
2007 Dodge Ram
1984 Dodge Ramcharger
Links
FAQ
Send me an e-mail:
Contact Form
Driver's Side Quarter & Rocker Panels
Part 16 - Rocker Rust -- Filler
Back to American Restoration Index
May 13, 2004
In the last article, I showed you a picture of what looked like an almost completed repair. The rocker does look good from a distance (especially since the primer is flat gray) but the flaws in the seams would stick out with shiny paint applied. To take care of those problems, I'll need to use a little bit of filler. For this repair, I'm actually using the real Bondo brand filler.
Before I start with the pictures, there's a few things you should know about using plastic body filler. First, it has an undeserved bad reputation. It got that from it's overuse when it was first introduced. It is possible to fill a six inch deep dent with it and finish it to make it look good but when it's that thick, it will fall out. The rule of thumb is to use the least amount possible. I was taught never more than 1/8 inch but I've heard people say that up to 1/4 inch is okay but quite honestly, if the dent is that deep, you really need to work the base metal some more.
To ensure good results, keep the following in mind:
-
The base metal needs to be perfectly clean, bare metal.
-
It needs to be a fairly rough surface so the filler has something to grab onto. I use 40ish grit paper to give it plenty of tooth.
-
After you finish prepping the surface, wipe it down with a good paint prep to remove all traces of oils and other debris. After you do that, avoid touching it with your body (skin oil can keep the filler from sticking).
-
The filler needs to be properly mixed. The filler can will have mixing directions. Follow them. If you are not using a fiberglass or metal reinforced filler, the filler will be about the same pinkish tan as a plastic spreader when properly mixed.
-
If the filler starts clumping when you apply it (it will get really stiff just before this happens), it's cured too much to use. Pay attention to how it's spreading and you'll see when it's cured too much to use. Generally, you have less than 5 minutes to use what you mixed.
-
When you mix the hardener in, fold it in instead of stirring it. This keeps air bubbles to a minimum.
-
Don't let the filler freeze before you use it and don't use it when it's been around more than a month or so after opening.
Enough with the lecture. Here's what I did last night:
The first thing was to strip the primer from the area I wanted to work on, scuff the metal, and clean everything with metal prep.
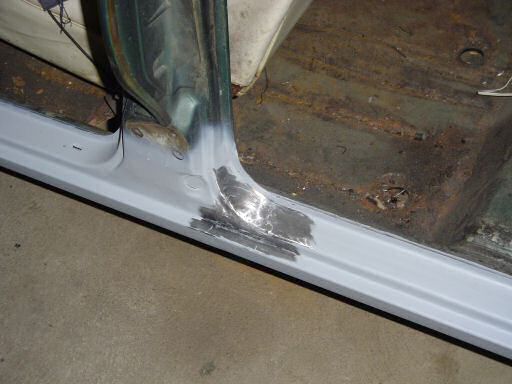
I then mixed up a wad of filler and applied liberally. I didn't mix much but I ended up having to toss about half of it into the can (not counting what I sanded off later).
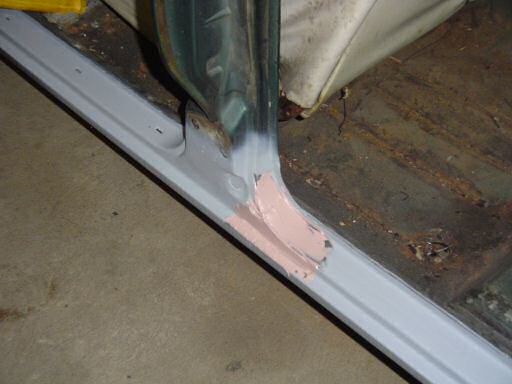
I then sanded the excess filler (most of what I applied) away. I got it close with 40 grit and then finished with 80 grit. The part that curves up the B pillar was done with paper backed with a thin rubber sanding block to keep it even and the flat parts were done with a long sanding board.
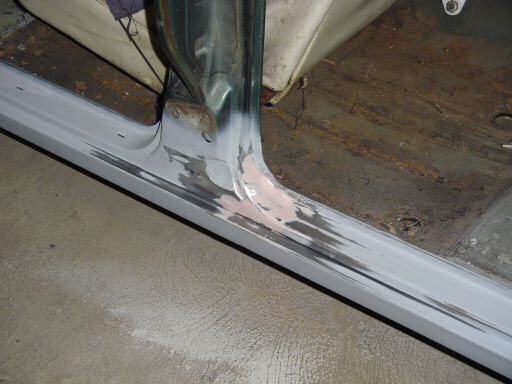
Notice the gray blob near the front of the B pillar? That's a factory flaw. On a show car, that would be fixed but since this car's going to be a driver (and it's barely as deep as a coat of primer), I'm leaving it alone. Also notice how little filler there is on the weld seam. That's what you're shooting for when you weld in replacement panels.
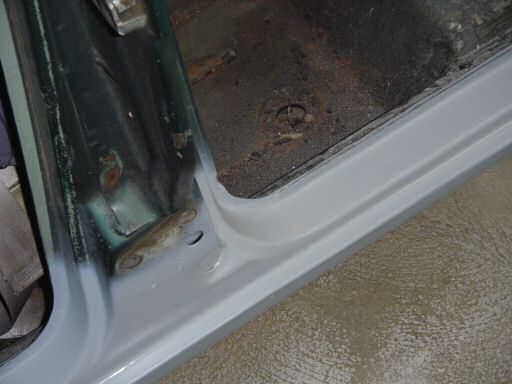
Here's what it looks like after it's been primed. The next steps will be to sand with 180 grit paper. I'll do the entire repair at once since that goes quick. After that step, the next thing will be to apply a guide coat over the normally visible parts of the rocker to get all of the little dents out of it.
In case you didn't know, the purpose of a guide coat is to find all of the high and low spots in the body. What you do is spray a mist coat of a contrasting color on the primer and sand until it's gone. High spots will expose bare metal (or filler) and low spots will still have paint in them. If all you have left is primer, you know that you have a perfectly even panel.
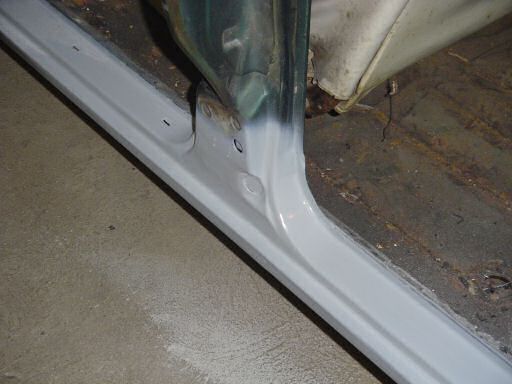
Here's another shot of the rear of the B pillar. Getting the complex curves in this area to look good took a lot of patience and work (especially since it's almost impossible to see this area once the door is on) but it's good practice for other parts of the car.
I'm not sure how many more filler pictures I'll do but I still have the following areas left to fill:
-
"Face" of the rocker cover at the B pillar
-
A few dents I found at the front of the rocker cover behind the front wheel
-
Rear of the rocker cover near the quarter panel
-
Quarter panel where it covers the end of the rocker
If anything interesting comes up doing these area, I'll be sure to share.
Up Next: Part 17 - Rocker Rust -- Getting Ready For Paint
Last Updated 05/23/04 04:42:50 PM