Matt's Old Cars.com
Fiddling with Rambler's since 1995
Project Charity: AMX
Technical Information
Photo Gallery
Rambler American Restoration
1978 El Camino
1967 Rambler American
2007 Dodge Ram
1984 Dodge Ramcharger
Links
FAQ
Send me an e-mail:
Contact Form
Driver's Side Quarter & Rocker Panels
Part 8 - Rocker Rust -- Outer Rocker Panel, Take 2
Back to American Restoration Index
December 5, 2003
I've spent a little bit of time since my last update trying to get the first outer rocker panel I made to fit properly. Unfortunately, it just isn't going to work. The good news is that the sheet steel drop I picked up from American Metal Supply is big enough that I can make another and the first one will be used to fix the trimming mistake I mentioned in my last article.
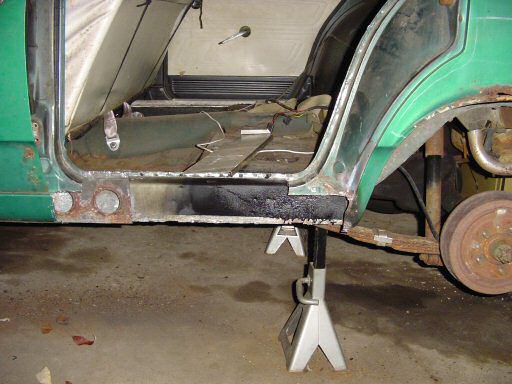
I also decided what I'm going to do with the rusted area on my inner rocker. I spent about 10 minutes with a wire brush and after I cleaned it up, I decided that it was in good enough shape that I'm not going to worry about it. After I finished with the wire brush, I prepped the area according to the instructions on the SEM rust treatment stuff I picked up a few months ago.
The prep work is pretty much the same as you'd do when applying any type of primer except you don't have to worry about getting rid of all of the rust. The hardest part of the prep was actually getting the car warm enough to use the stuff. According to the can, the surface you need to apply it to should be between 50 and 90 degrees and the can itself should be between 70 and 90 degrees. I had the can in the house for a few days to get the product warm and all it took was about 3 hours of running my 35,000 BTU torpedo heater to get the car itself up to 67 degrees. The picture below shows the results of the rust treatment.
Since the above picture was taken, I made a new outer rocker panel and I've fitted it to the car. If you need to make one of these for your car, the panel is 5 inches tall and it has a half inch flange where it meets the wheel house and along the bottom edge. The wheel house flange should be bent so it faces away from the inner rocker panel. The flange along the bottom should be bent so it faces the inner rocker panel. You'll also need to cut a notch into the bottom near the wheel house to allow for a flange on the rocker cover. You'll need to make the notch a half inch tall and an inch long.
The picture below shows what the outer rocker panel looks like after it was fitted.
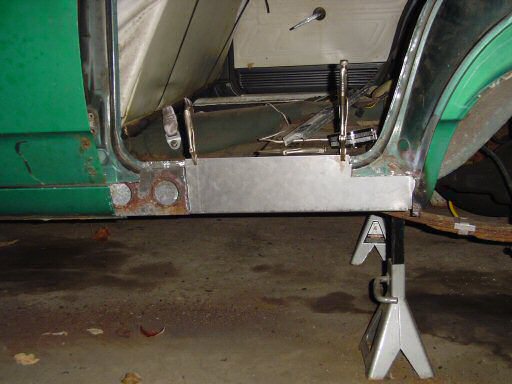
You'll notice that the panel I made does not have the circular holes in it. I'm not sure what purpose those holes serve but I can tell you that the new panel is much stiffer than the original. All that I have left to do on it is punch some holes along the top (you could drill them but by using a punch, you don't have to clean up any burrs) and wheel house flange and paint it. I'll also be painting the inside of the rocker cover. The next step will be to start welding on the new parts!
One quick note on painting: Make sure that you do not get paint on the area where you will be welding! The paint will burn and you'll end up with very nasty, weak welds. You do need to provide some protection for these areas so what you should use is a weld through primer. Weld through primer is basically zinc paint but it's specially formulated to handle the heat (this picture from the cowl repair shows just how well it holds up). This primer is very expensive (the spray can I bought was $18) so you should limit its use to the areas where you're welding. What this means for this panel is you apply it to the top inch of the panel, both flanges, and any place you're welding to the existing body.
Up next: Part 9 - Rocker Rust -- Let The Assembly Begin!
Last Updated 02/15/04 05:04:02 PM